How to Backup Your SMS, Calls and WhatsApp Messages to Gmail
This how-to guide will explain how to set up SMS Backup+ to save all your communication to Gmail. It should help you use the app for the first few times until you are familiar with its different configurations.
Step 1: Set up SMS Backup+
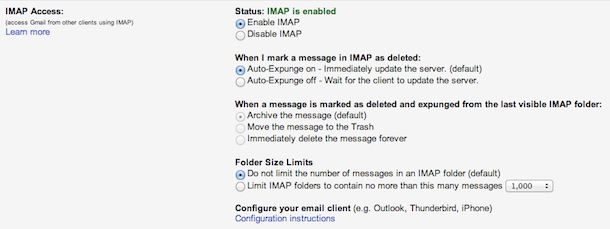
In order for SMS Backup+ to work, you need to enable IMAP access in your Gmail inbox. To do that, go to gmail.com in your computer’s browser, click the Settings icon in the top right and choose Settings. Jump to the Forwarding and POP/IMAP tab, and make sure you enable IMAP like in the screenshot below and make sure you save the settings. Now, you can install SMS Backup+ on your phone, click on Connect and give it access to your Gmail account.
Step 2: Choose Your Preferences
SMS Backup+ is a very configurable app and you might get lost at first with the different settings. Here’s what you need to configure at first.
Set and Enable Auto Backup
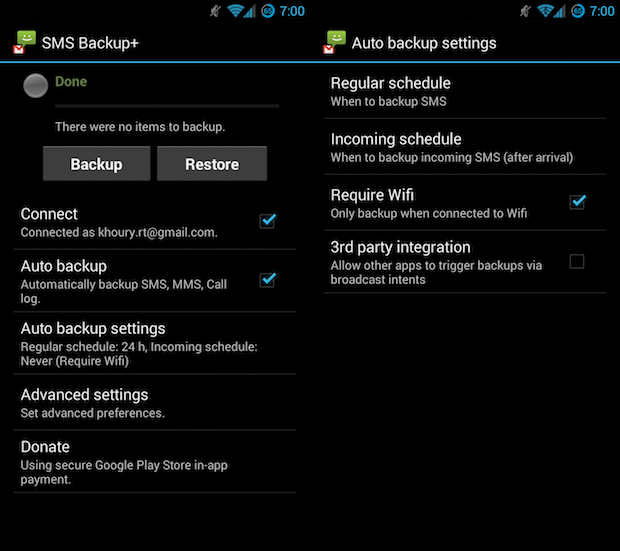
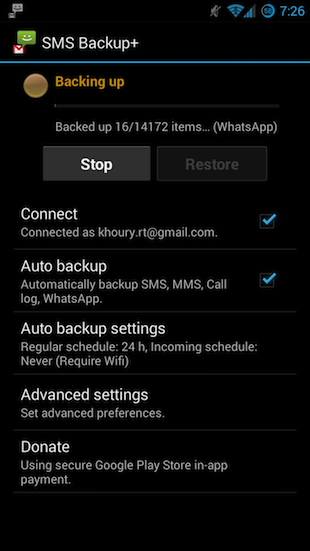
In the main SMS Backup+ window, you need to tick the Auto Backup option. This will ensure that your device is automatically sending your new messages to Gmail in the background without you needing to lift a finger. If, instead, you’d rather manually trigger the backup, you can leave it disabled.
The Auto Backup Settings page lets you pick the frequency of the backups — from every half hour to once daily — and whether the backup should also be triggered after receiving a new message. I personally prefer to leave that last one set as Never, since I don’t receive a lot of messages and I’d rather let the app run only once daily. You can also force the app to only use WiFi, which is a wise decision if you also want to backup your Whatsapp communication.
Interesting Advanced Settings
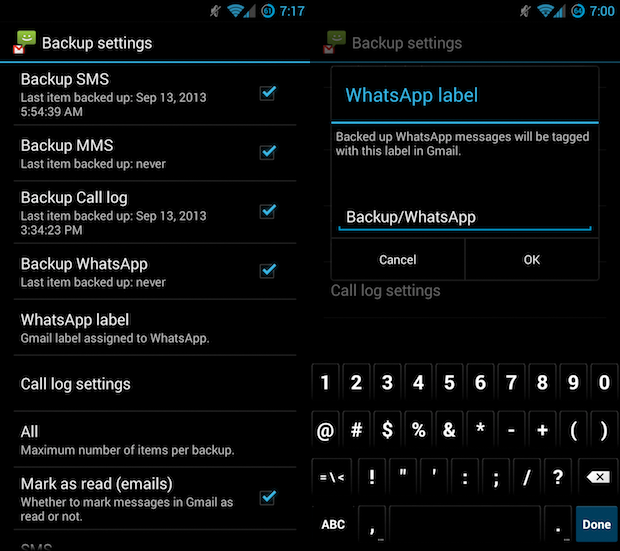
Under the app’s Advanced Settings, you will find more customization options. Here, you can specify the name of each backup’s folder — or even set them up as “Backup” subfolders like I did — activate Whatsapp message backup, choose which kind of calls to backup, or limit the app to only save content from select groups — Family, Coworkers, Friends, etc.
There are also settings for the Restore function as well as options to enable notifications so you always know when SMS Backup+ is running.
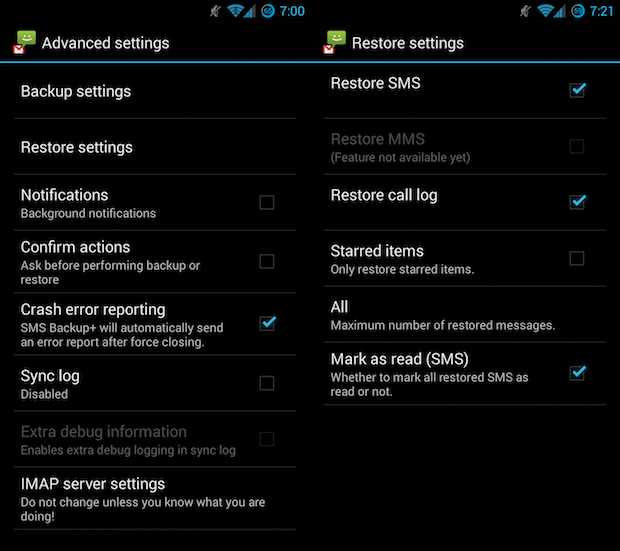
The developer has set up a very useful FAQ page that explains a lot of the different options and quirks with SMS Backup+.
Step 3: Backup
Once you’ve configured SMS Backup+ to your liking, you can go back to the app’s main screen and launch the first backup. It might take some time, depending on how many messages you have on your device, so take a short break and come back once it’s done. The Restore option does the inverse procedure, grabbing your backed up communication from Gmail and getting it back onto your phone — it doesn’t work with Whatsapp messages though!
You can then go to your Gmail inbox and check the side column for the different labels. You should be able to find the ones you set up for SMS Backup+ to use, with all your communication neatly saved in them. As an added bonus, since Gmail supports search and smart filters, you can easily find any message you exchanged with anyone there, even if it no longer is on your phone after a reset. You can also set up Gmail filters to star communications with special contacts or messages with specific keywords in them.
Essentially, with SMS Backup+, you’re not only archiving your communication, you’re also keeping it in a place where you search it, filter it and organize it, which is miles ahead of what your phone’s SMS, Dialer and Whatsapp apps allow you to do.
